Lens filters can transform your landscape photography. They're useful (some would say essential) for bringing out colours and textures, getting the exposure just right, and adding atmosphere to a scene.
However, there are so many different types of filter on the market that it's not easy knowing which to choose. As a result it's tempting to give up and stick to using your camera unfiltered. This is a shame because by doing so you'll be missing out on some great ways to improve your shots.
There are really only 3 filters that professional landscape photographers recommend - polarisers, graduated NDs, and warming filters. Let's look at each in turn, starting with the most important.
Polarising Filters
If you only want to buy 1 filter for your landscape photography, it should be a polariser. It will make more difference to your shots than any other type, and can be used for most other photographic subjects too, making it a really versatile filter to own.
Polarising filters increase saturation giving richer, more vibrant colours. Image by David.
Polarising filters enhance saturation, so colours look more vibrant, particularly in blue skies and green foliage. They also cut down on reflections, allowing you to see through water and glass, and taking the distracting sheen off rocks, leaves, and other shiny objects.
Overall, a polariser removes the harsh glare caused by bright sunlight, and reduces the problems that it causes. This leaves your photos looking better balanced and more natural, as they did in real life.
Polarisers are most effective when the sun is off to one side rather than in front of or behind you, so try to adjust your framing to point the right way. You can control the strength of the polarising effect by rotating the filter.
The only time polarising filters don't work well is when using a very wide angle lens - the sky ends up a very uneven shade of blue, and you can get some severe vignetting (darkening) in the corners of the image.
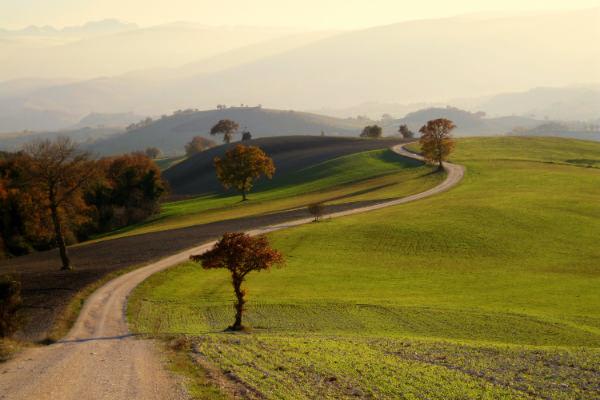
Graduated Neutral Density (ND) Filters
A neutral density filter is called "neutral" because it doesn't affect the colours in your photo; its only purpose is to reduce the amount of light reaching your camera's sensor.
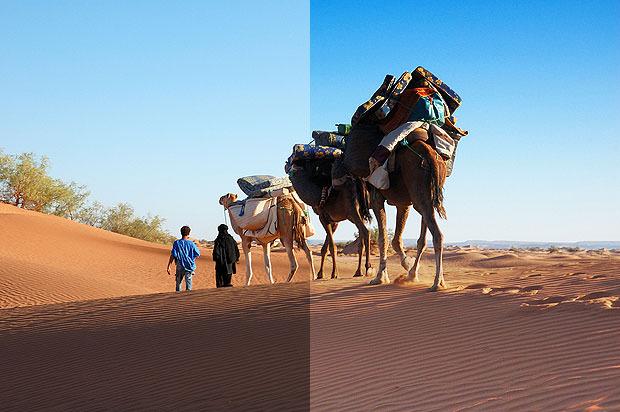
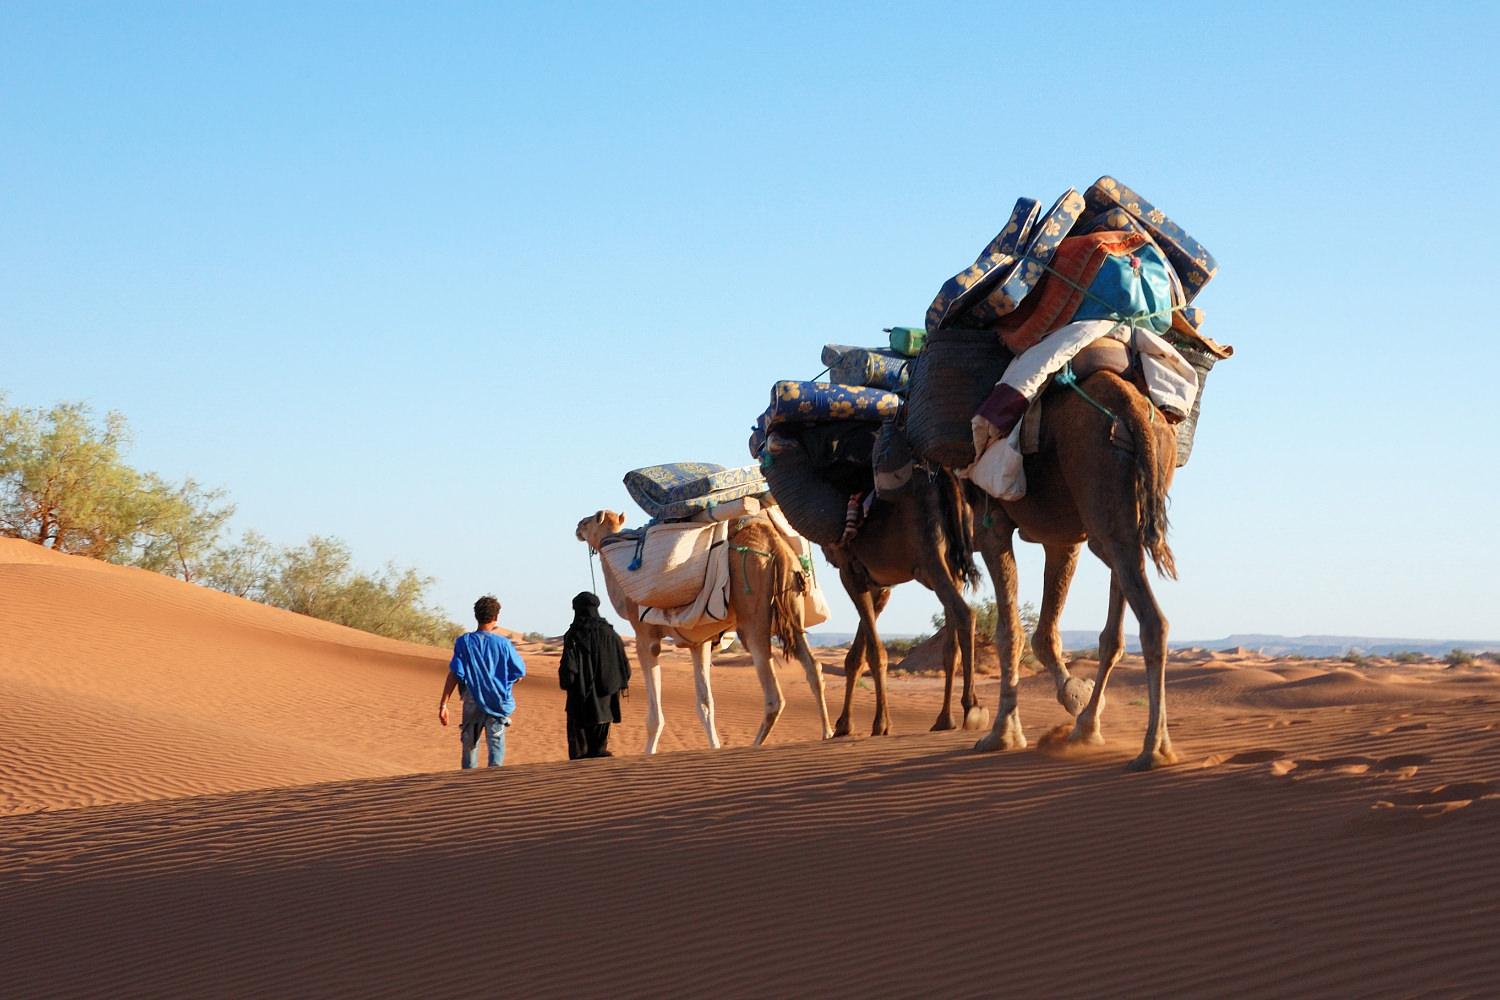
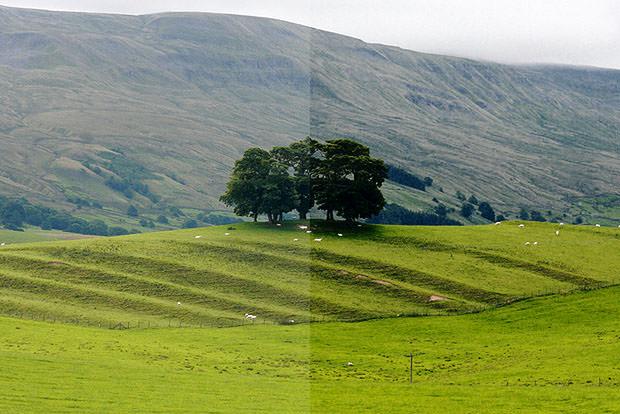
Graduated ND filters balance the exposure of the bright sky against the dark ground. Image by Sylvain Bourdos.
Normal ND filters reduce light evenly across the whole scene, but graduated NDs have a gradient effect, changing from fully darkened at the top to completely transparent at the bottom. This means that the top of the lens lets in less light than the bottom.
This is really useful in landscape photography, because you'll often find yourself shooting a scene with a bright sky and relatively dark ground. The graduated ND filter helps balance the exposure of the scene, allowing you to capture everything without losing detail in the highlights or shadows.
Grad ND filters are available in a number of strengths. The most common are 0.3, 0.6, and 0.9, which correspond to a 1, 2, or 3 stop reduction in light at the darkest point. It's worth carrying a couple with you to cater for different conditions. A good choice is a 0.3 and a 0.6, as these can be combined to give a 0.9 effect.
Warming Filters
Eye-catching landscape photography relies on good lighting. Unfortunately, on overcast days, landscapes can appear dull, cold, and uninspiring.

Warming filters add a warm, orange cast. Image by Luis Argerich.
A warming filter gives your scene a slight orange tint, helping to reduce the cold, blue cast and breathe some life back into your image. The most popular warming filters are those in the "81" series, which consists of the 81A, 81B, and 81C filters in ascending order of strength.
Warming filters have become less popular in recent years because you can now use software like Photoshop to achieve the same effect but with more control. It's up to you whether you prefer doing things in-camera or later in your editing software, but a warming filter certainly isn't as important as it used to be and can be considered optional.
Combining Filters
You can combine filters (a process known as "stacking") by screwing one on top of the other. This allows you to mix their effects, for example using a polarising filter to enhance colours and a graduated ND filter to correct the difference in brightness between the ground and sky.
However, stacking filters can cause some unwanted side effects:
Less light - Each filter you add to the stack reduces the amount of light reaching the sensor. To compensate, you'll need to use a slower shutter speed, wider aperture, or higher ISO. When shooting landscapes with a tripod this isn't an issue, but it can be when hand-holding.
Reduced image quality - The glass used in filters is generally not as high-quality as that used in lenses. Filters also tend to pick up small scratches and dust particles. The more filters you use, the more noticeable this becomes, causing a deterioration in the final image quality.
Vignetting - Because of the way light travels through lens filters, each one leaves the corners of the image looking darker than the rest (an effect known as "vignetting"). This becomes more apparent the more filters you use, particularly at wide angles. Vignetting can be corrected in post-production so it's not a major issue, but it's still something you should be aware of.
Using the photo filters listed above is a tried-and-tested way of improving your landscape photography. They can be adjusted and combined to suit virtually any conditions, and are the 3 filters you should learn to use before any others.