I have always loved night photography - the interplay of different light sources produces a fantastic array of colours, and the contrast between light and dark areas creates a vibrant, engaging scene.
Light trails are one of my favourite night photography subjects. Their twisting shapes lead the viewer's eye around the image, producing some wonderfully abstract photos. They are also a great way to begin experimenting with your camera's manual exposure settings.
The key to photographing car light trails is choosing a good composition and capturing plenty of trails. The great news is that they can be very easy to shoot, and you can produce some amazing images with even the most basic of equipment.
Location and Viewpoint
Choose a shooting location that will produce some interesting shaped light trails, and preferably somewhere with plenty of traffic so that you get lots of car trails. Picture the cars moving through the scene and imagine how their light trails will look. Winding roads and traffic islands are ideal shooting locations, but a straight road can also be interesting provided you capture enough light trails.

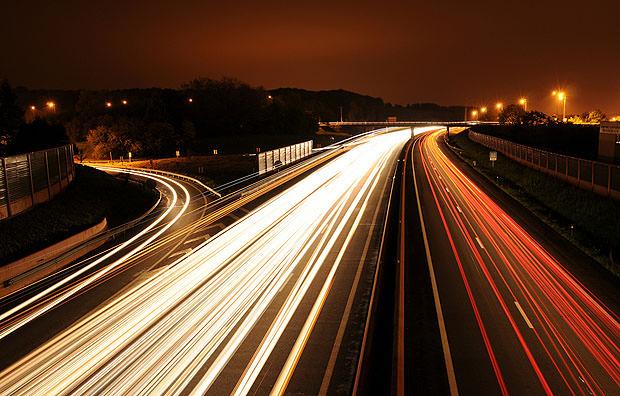
Move away from eye level for added depth and a more engaging photograph. Image by Sparky.
It is our first instinct to shoot from eye level, but this will usually produce a load of horizontal car trails with nothing much happening in the rest of the frame. Look around for a bridge or ledge so that you can get up above the cars, or alternatively crouch down close to the ground. This will fill the frame better and give the photo a more three-dimensional, dynamic feel.
Car Direction - Towards or Away?
When choosing your viewpoint bear in mind that car lights have different colours - white at the front and red at the back. The colour of the light trails in your photo can dramatically affect the feel of the image. Often you will not have the luxury of choosing the light colour, but if you do then consider which would suit your scene best.
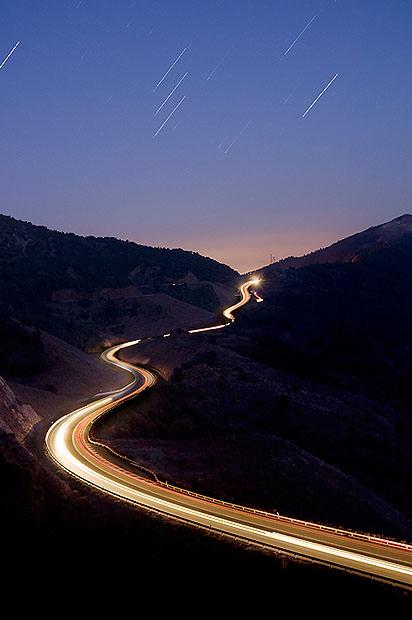
Different coloured trails give a different feel to the shot. Image by Thomas Bresson.
Plan Your Exposure Time
Exposure time is a critical factor when photographing night time car light trails. A longer exposure will give you more trails, and extend their length, but if your exposure time is too long you will see the brightness of each trail beginning to fade, which is particularly noticable on a quiet road.
A good starting point is to look through your viewfinder and time a car passing completely through your scene. Then set your exposure time to this value plus a few seconds, to allow you to open the shutter just before the car enters the scene, and to ensure the car exits before the shutter closes.
Time how long it takes for a car to move through the shot and use that as the basis for your exposure time. Image by Aitor Escauriaza.
Experiment with longer and shorter shutter speeds. This will yield varied, and often more interesting, images.
If your camera doesn't give you full control over exposure time, such as with a digital compact, you can still photograph car light trails by switching to night mode. This should give you an exposure time of a couple of seconds, more than enough to produce some great photos.
Tripod or Not?
The question of whether to use a tripod depends entirely on the sort of image you are trying to capture. Personally I prefer my night shots to be nice and crisp, so I like to use a tripod (or at least a sturdy surface), but the camera shake caused by hand holding your camera can produce some interesting abstract effects.
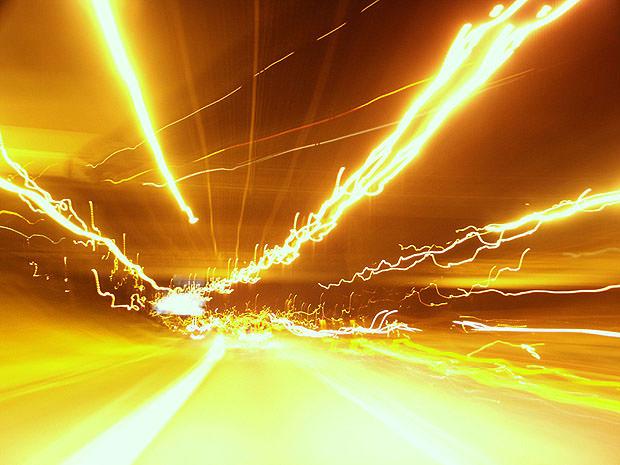
Create some stunning abstract effects by taking your camera off its tripod. Image by Rick Harrison.
Taking It Further
Have fun and experiment when shooting car light trails - try panning, zooming and spinning the camera whilst shooting. Each will create a dramatically different image and may help to turn a good photo into a great one.