Vignetting is a darkening of a photo towards the corners of the frame. Photographers used to go out of their way to avoid it, but recently it's become a popular creative effect, and one which people are keen to replicate in image processing software like Photoshop.
Photoshop allows you to add a basic vignette effect through its Lens Correction filter, but the method I'm going to teach you is more versatile and gives you more control over the strength and position of the effect.
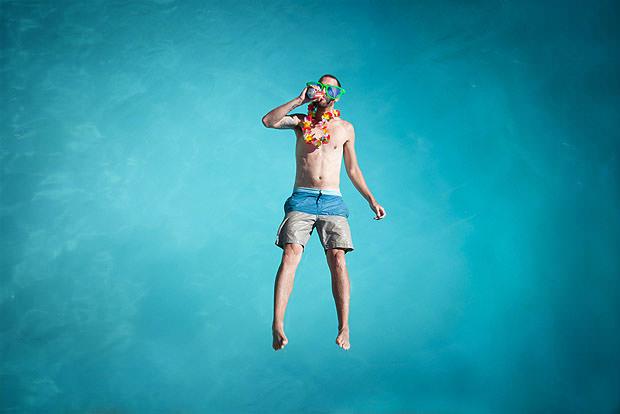
1. Open Your Image
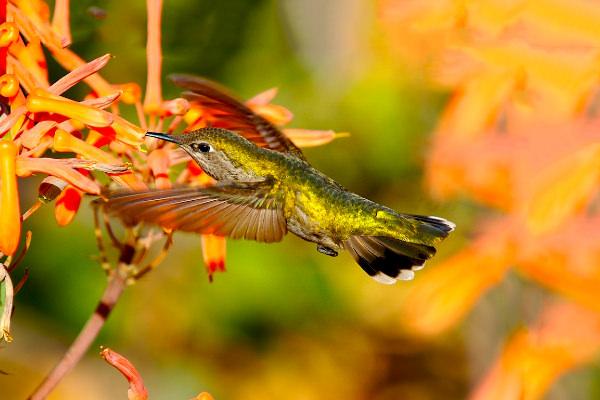
Start by loading your image into Photoshop. I'll be using the following picture - feel free to download it and follow along.
This is the photo I'll be adjusting. Image by Nate Bolt.
2. Create an Oval Selection
Select the elliptical marquee tool and use it to draw an oval selection over the centre of your image, starting near the top left corner and finishing near the bottom right.

Draw an oval selection over the middle of your photo.
3. Feather the Selection
In order to create a gradual darkening effect rather than a sharp line you'll need to feather your selection. Go to Select > Modify > Feather and choose a large value - I've used 75 pixels because I'm working with a small image but for larger images you may need to go as high as 250 pixels.
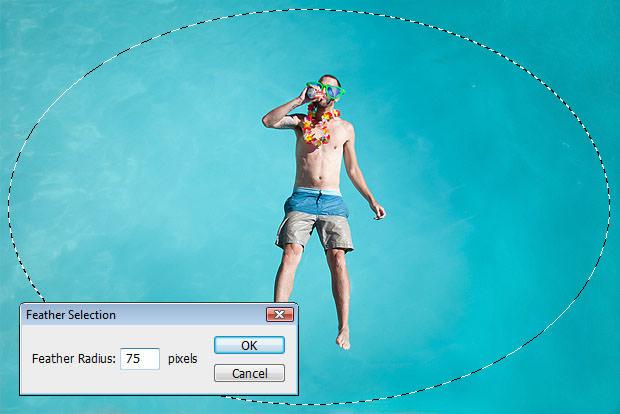
Feather your selection.
4. Invert the Selection
At the moment we have the centre of the image selected, but we actually need to select everything outside this oval. Do this by going to Select > Inverse.
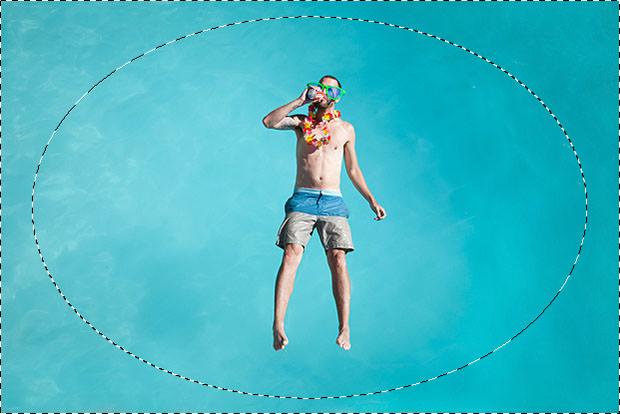
Invert your selection.
5. Add a Curves Adjustment Layer
With your selection still active, add a Curves adjustment layer (Layer > New Adjustment Layer > Curves). The image won't appear any different just yet, but if you look in the Layers panel you should see the new adjustment layer above the background layer. Importantly, the adjustment layer should include an associated mask in the shape of your selection.
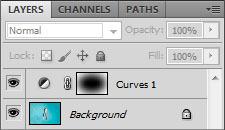
The new Curves layer is masked in the shape of our selection.
6. Adjust the Curves to Control the Vignette Effect
Finally, you can make changes to the Curves layer to adjust the vignetting effect. Click on the curve to add an adjustment point near the middle, then drag it downwards to darken the corners of the photo, or upwards to lighten them.
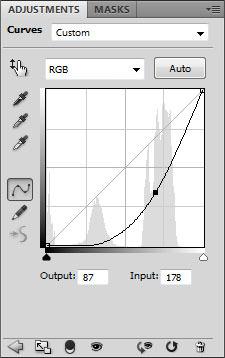
Make changes to the Curves layer to control the vignette effect.
Keep adjusting until you're happy with the effect, then save your image. Remember that because the adjustment is being made on a separate later you can easily tweak or remove it later without affecting the quality of the original picture.
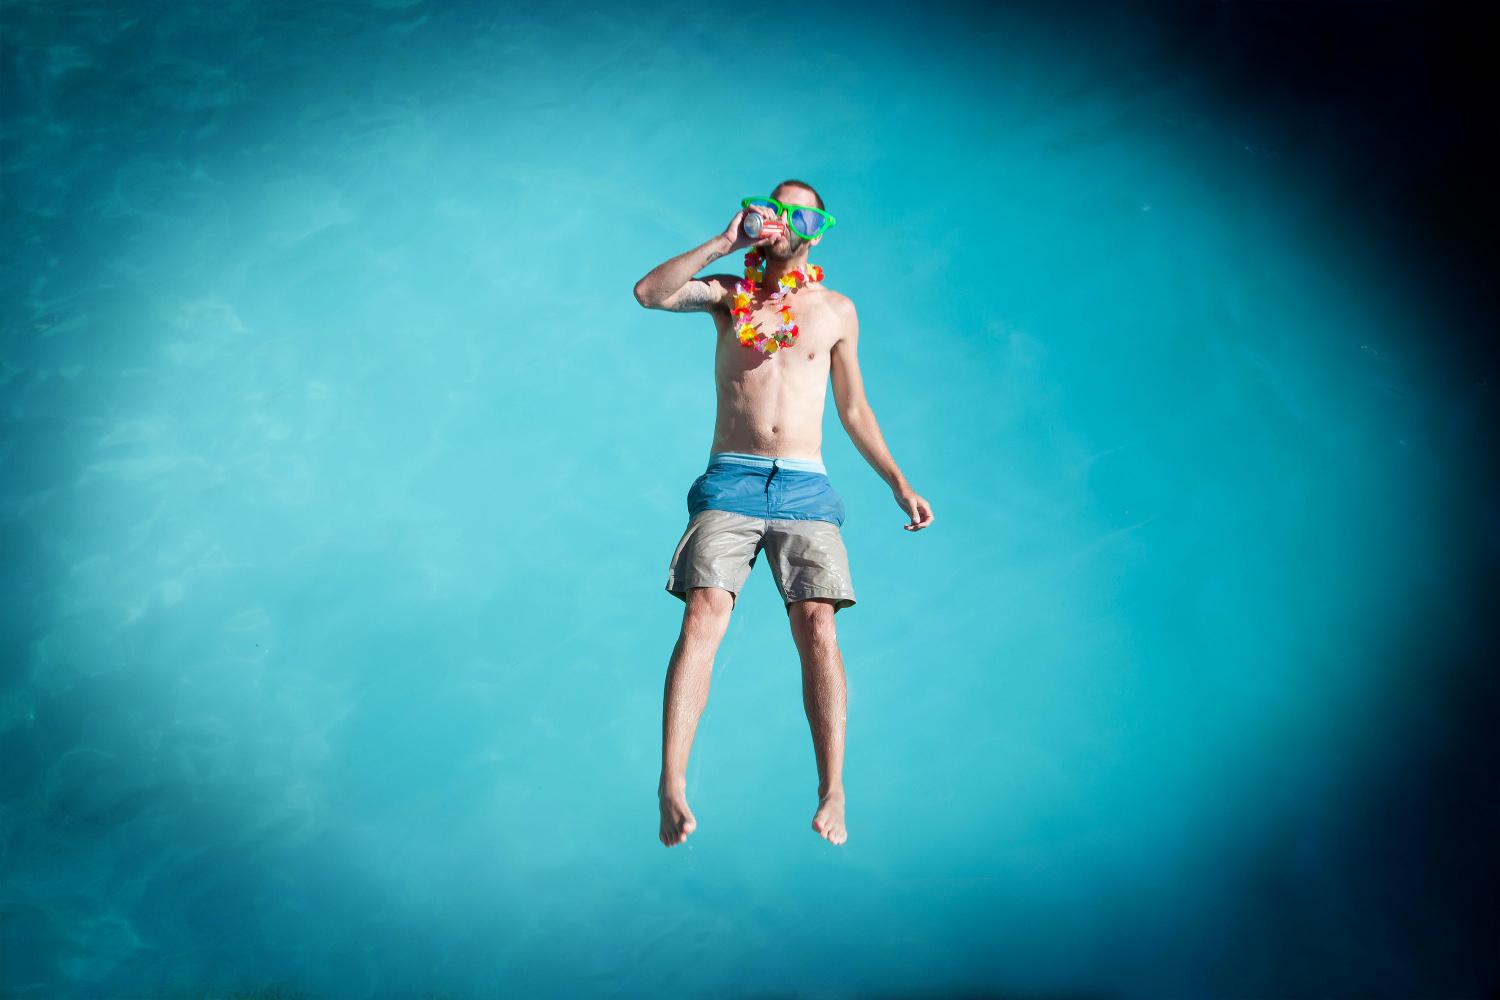
The final image, with vignetting effect applied.
That's all there is to it! Vignetting can really add interest to a photo, although it's generally best to keep the effect fairly subtle rather than overdoing it. Don't be afraid to experiment with different selection shapes, sizes, and positions to create just the effect you want.