Stability is very important in photography. It's essential for avoiding blurred photos, especially when shooting in low light. Traditionally, photographers have used tripods to provide a solid, stable base for their cameras.
However, while tripods do an excellent job, they're not suitable for all situations. If you need the ability to move around quickly, such as when photographing sports or wildlife, or if you're shooting in a crowded area, a tripod can be impractical and cumbersome.
Monopods are a better alternative in cases like this. They provide a similar level of stability as a tripod, but are quicker and more practical to use. Here's how to use a monopod to set up a strong support in no time.
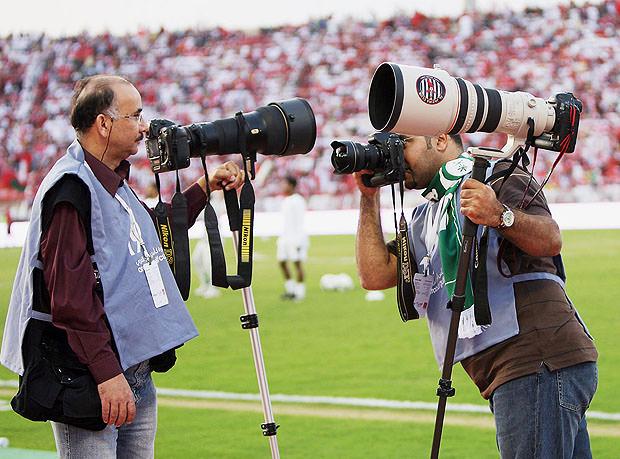
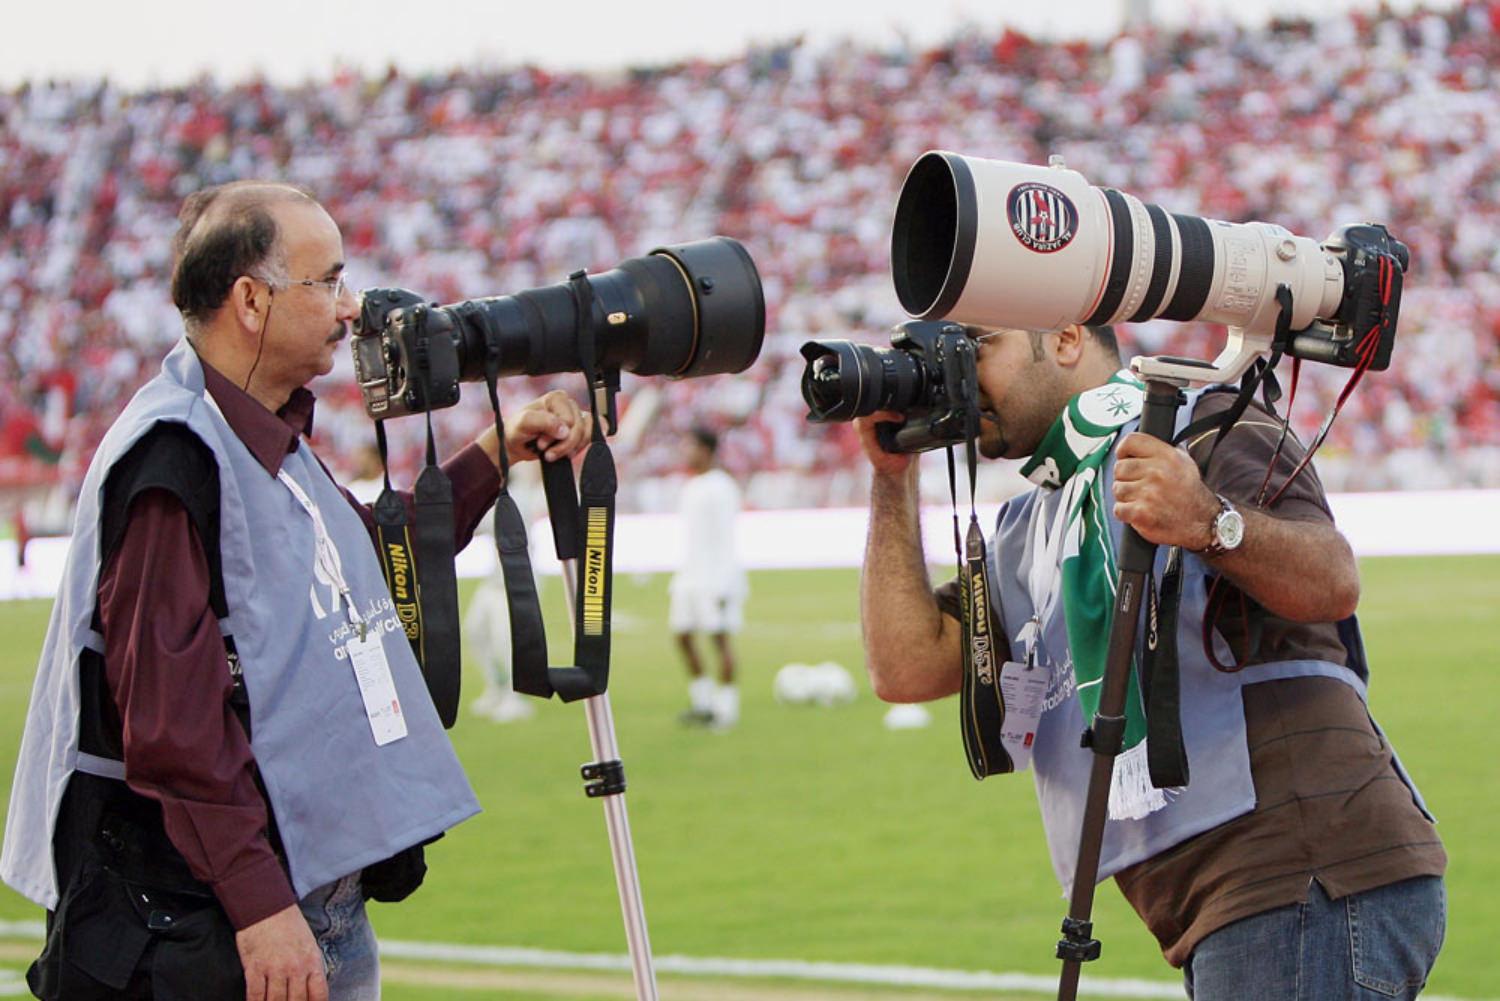
Monopods are perfect when you need to be able to move quickly, like in sports photography. Image by Khaleel Haidar.
Attaching Your Camera
There are two ways to attach your camera to a monopod. The first is to screw the monopod's screw thread directly into the camera body. This is fine if you're using a fairly small, light lens.
If you're shooting using a long, heavy telephoto lens, it's better to use a tripod mount ring. This fixes the monopod to the lens rather than the camera body, giving better balance and stopping the monopod from rotating in your hands as you try to position it.
There are various different types of monopod head available, and ball heads offer the most flexibility. They allow you to shoot in portrait or landscape orientation, and angle your camera to adjust for any sloping of the monopod.
Holding the Monopod
Use your left hand to grip the top of the monopod shaft, just below the point where it attaches to your camera. Place your right hand on your camera as normal, so that you've got easy access to the shutter button and settings controls.
When taking a picture, use your left hand to push down gently along the monopod's pole. This helps to anchor it in the ground, improving stability and reducing camera shake.
Tuck your elbows into your body. This will reduce the amount of side-to-side movement, giving you an overall sturdier shooting position.
Positioning the Pole
There are a few different ways to position the monopod's pole. Which one you choose depends on personal preference, so I suggest trying them all out to see which feels more comfortable. These methods are described for right-handed people; if you're left handed simply reverse the directions.
The Human Tripod
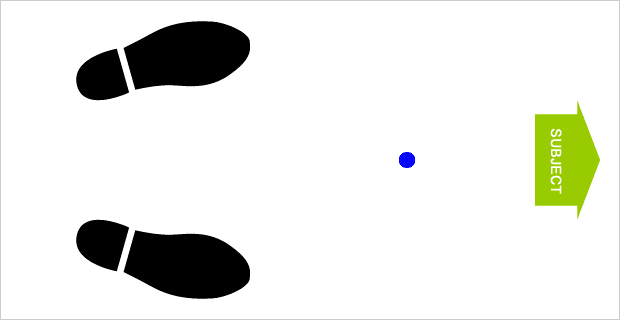
Stand with your feel at a comfortable, stable width (usually about 2 feet), facing your subject. Extend the monopod so that your camera is a few inches above head height, and then position the end of the pole about 3 feet in front of your body, half way between your left and right feet.
Lean the monopod towards your body until your camera's viewfinder is at eye level. Combined, the monopod and your 2 legs will form a tripod, effective for preventing movement in all directions.
This position works well on soft ground such as grass, but you might find the end of the shaft slipping on harder ground such as concrete. If that's the case, one of the following 2 alternatives will provide more stability.
The Archer
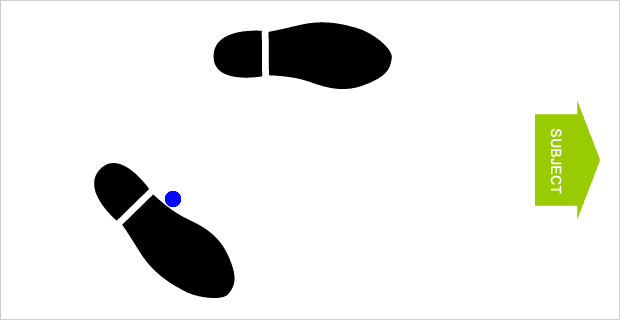
Face your subject and move your left foot forward a foot or 2. Turn your right foot outwards slightly until you're in a comfortable but solid posture.
Place the end of the monopod into the instep of your right foot, so that the shaft touches your shoe, preventing the end moving around. Gently push your camera forwards until the monopod pole rests firmly against the inside of your left thigh. You may have to lean back slightly or move your feet closer together to get the shaft closer to vertical.
This technique works especially well on hard, slippery ground, where keeping the end of the monopod still can sometimes be a problem.
Through the Legs
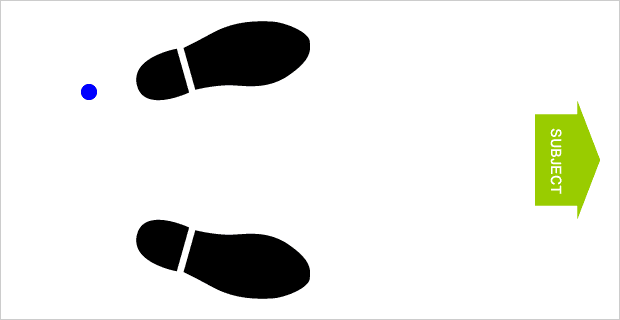
Again, face your subject with your feet about 2 feet apart. Slide the base of the monopod between your legs and position the end about 3-6 inches behind your left heel.
When shooting, push the monopod to the left so that it rests firmly on your inner left thigh.
This technique works well on soft and hard ground, but it can feel a little uncomfortable and make balancing your body harder.
Other Monopod Uses
As well as using a monopod to provide a stable base for avoiding blurring, they have a number of other uses:
Extending your reach - You can often get a unique angle or clear a crowd by holding your camera up above head height, supported on the end of your monopod. Use the self-timer or a cable/remote release to trigger it.
Instant tripod - Rather than supporting your monopod by hand, try leaning it against something solid like a fence or bench.This provides an even more sturdy support, and can be just as good as using a tripod.
Supporting heavy equipment - Some camera and lens combinations weigh several kilograms, and hand-holding all that equipment can be very tiring. Using a monopod to support this weight is popular among sports photographers, who often have to spend hours in one place with very long, heavy lenses.
Monopods are extremely versatile, and make a good addition to any photographer's gear. They aren't suitable for all types of photography, but they make a great alternative to a tripod in situations where you need extra flexibility and manoeuvrability.