Red eye is a common problem in photography. It's the effect where a person's eyes appear to emit a bright red glow, and it can ruin an otherwise great photo. Here I'll explain why it happens and what you can do about it.
What Causes Red Eye
Red eye occurs when you use your camera's flash in a poorly-lit environment, like in a dark room, nightclub, or outdoors at night. In the dark, people's pupils open up wide to let in as much light as possible. When you use a flash, the light travels through their dilated pupils, bounces off the backs of their eyes, and is sent back the way it came.
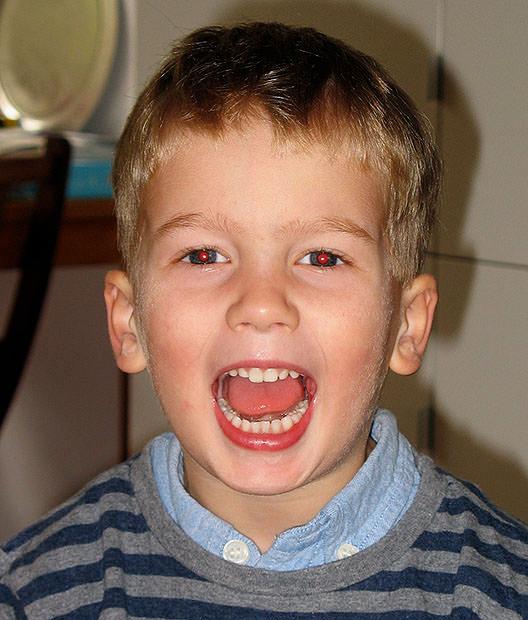
The red eye effect is caused by your camera's flash bouncing off the back of the subject's eyes. Image by Bert Boerland.
If your camera's flash is mounted close to the lens, as with most compacts and DSLRs with built-in flash, then the majority of this reflected light ends up back at the lens and is recorded in the final photo, giving the impression that it's shining out of the person's eyes in an eery way.
The red colour comes from the blood in the tissues at the back of the eye.
How to Prevent Red Eye in Your Photos
As they say, prevention is better than cure, and there are several ways to reduce the chances of red eye in your images:
Turn off your flash - This is the most effective way of dealing with red eye. If possible, try adjusting some of your camera's settings (such as aperture, shutter speed, or ISO speed) so that you can disable the flash altogether.
Turn on more lights - The red eye effect is most prominent when the person's pupils are wide open. If you're shooting indoors, turn on a few more lights to brighten the room and force their pupils to shrink.
Use an external flash - Rather than using your camera's built-in flash, use an external flash held or mounted as far away from the lens as possible. This is much less likely to cause red eye because the light reflected off the retina won't be sent towards the lens.
Bounce your flash - Some camera-mounted flash units can be rotated. Aim it towards a pale-coloured ceiling or wall so that the light reaches your subject's eyes from a different angle and isn't reflected towards the lens.
Soften your flash - Flash units tend to produce a very strong, harsh light. You can soften this by putting some tissue paper over the front, or fitting a shop-bought flash diffuser. This reduces red eye and produces a less harsh, more pleasing light. It will reduce the effective range of your flash though, so don't stand too far from your subject.
Use red eye reduction mode - Most cameras have a built-in red eye reduction flash setting. This fires the flash twice - once to make people's pupils contract, and a second time to capture the photo. It does a great job providing everyone is looking at the camera for both flashes.
Ask people to look away - The red eye effect only occurs when people are looking directly at the camera. Try photographing them from a slight angle, with them looking away from the camera, such as when they're chatting, eating, or dancing.
Removing Red Eye
No matter how carefully you follow the above advice, you'll still occassionally end up with a touch of red eye in your photos. Thankfully it's a very common problem, and the boffins who write photo editing software have come up with tools that can remove it in an instant.
The following guide describes how to use the Photoshop Red Eye tool, although other software works in a very similar way, so you should be able to adapt the instructions easily enough.
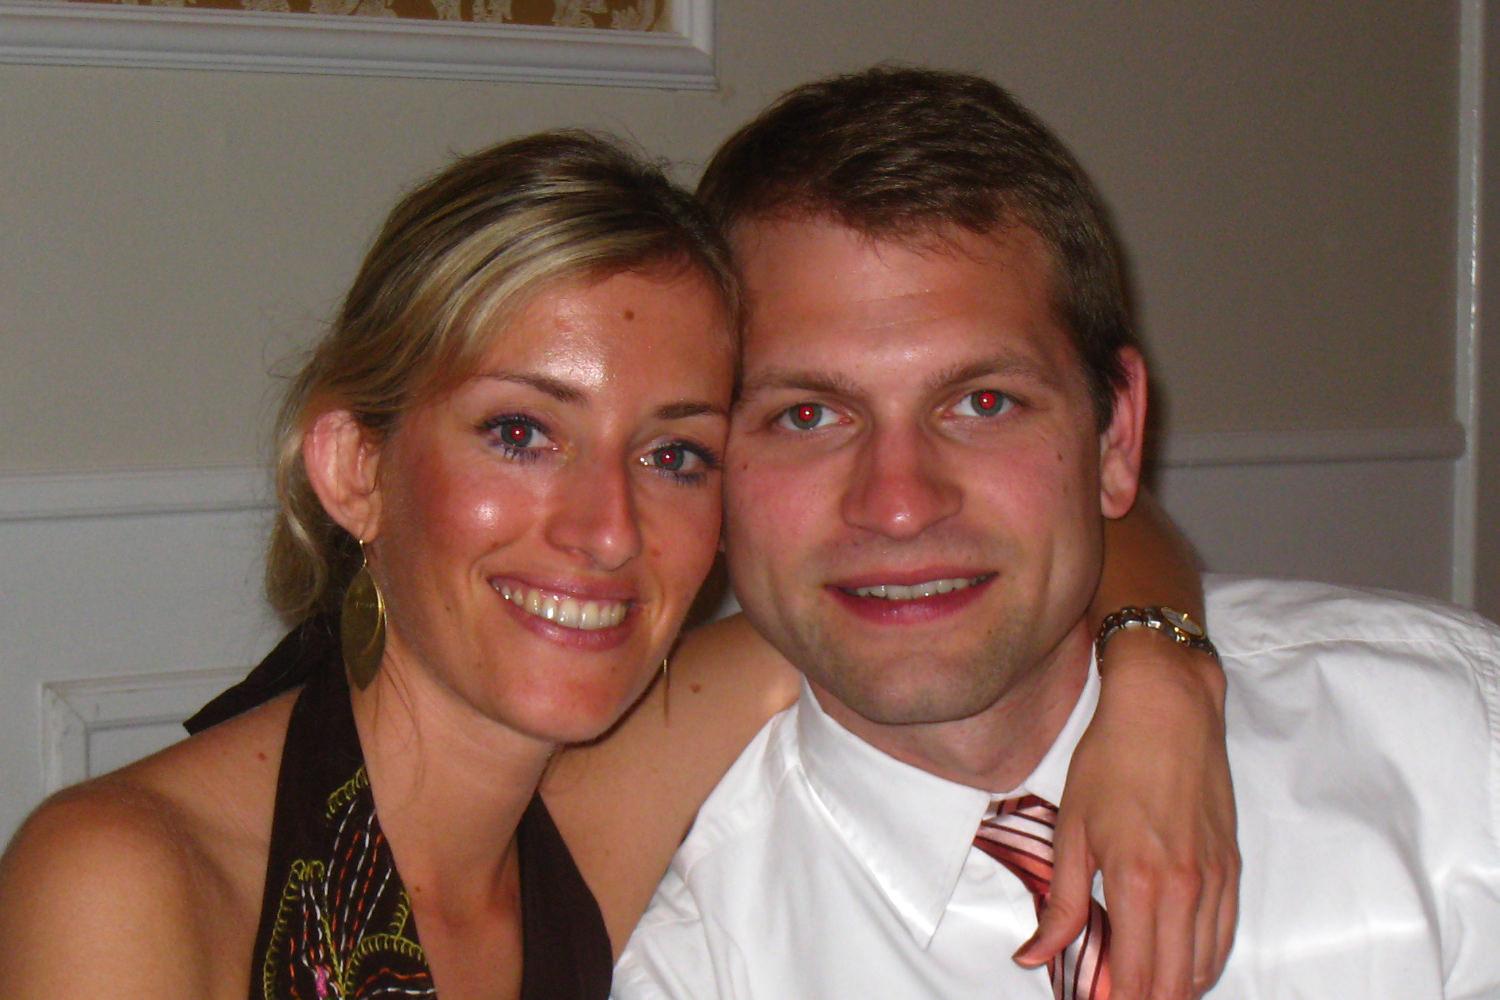
Open Photoshop and load the image you want to correct. I'll be using this photo:
The photo we'll be fixing. Image by Russell Harrison Photography.
As you can see, both of the people in this picture have quite severe red eye because of the dark room and the fact that they're looking directly at the camera.
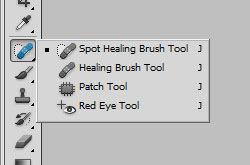
Select the Red Eye tool, found in the Tools panel in the same pop-out list as the Healing Brushes and Patch tool:
Zoom in close on the first eye you'd like to correct. Click the Red Eye tool's crosshair on the red part of the eye. Photoshop will think for a second or two and then you should see the pupil turn from red to black - simple!
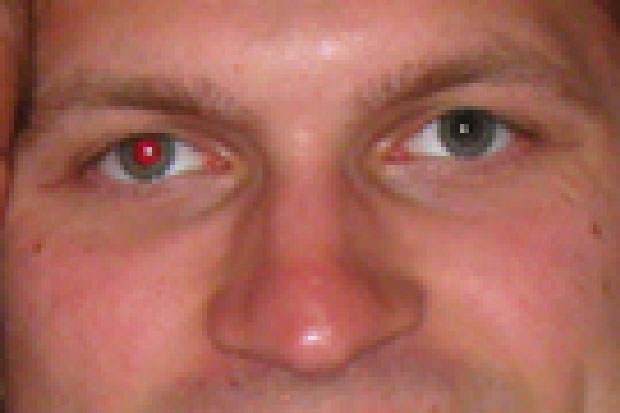
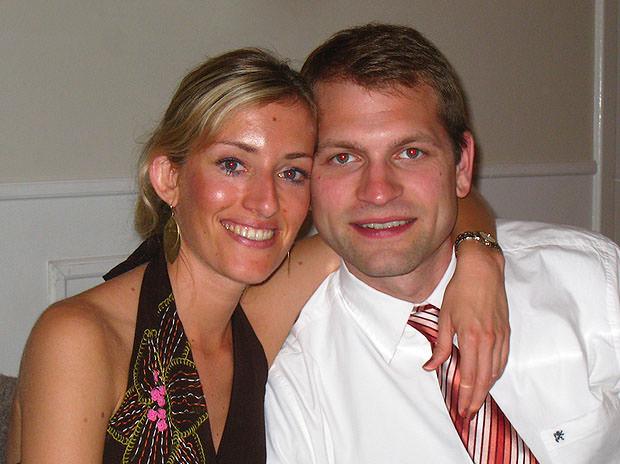
The Red Eye tool quickly turns the red pupil to a more natural colour.
If the eye is too small to click on accurately, you can click and drag with the tool to draw a box around it. When you release the mouse, Photoshop will attempt to find the pupil and correct its colour.
You'll sometimes find that Photoshop doesn't get things quite right. Common problems include some of the red being left, or the black "bleeding" over into the rest of the eye or skin. If this happens, undo your changes, adjust the "Pupil Size" and "Darken Amount" settings, and try again.
Repeat these steps for each eye, checking that each is corrected properly before moving on to the next. It only takes a matter of seconds to correct most photos, and it can make a big difference to the final image.

The final image with all red eye removed.
The red eye effect needn't be a problem in your photography. Now that you're aware of its causes you should be able to do a better job of avoiding it in future, and when it does happen you'll be able to deal with it quickly and effectively.