I really enjoy taking my camera out to explore new places and see what interesting subjects I can find. Often when I do, I'll stumble across a stunning landscape that would make a great photograph.
Unfortunately, you often can't fit enough of the scene into a single frame to do it justice. This leaves you with two options - either shoot a smaller part of the scene, potentially losing some of the overall impact, or take multiple shots that can be stitched into a panorama.
Panorama photography is generally very easy, though it does require you to plan your photo in advance and be methodical with the way you shoot it. Follow these steps to ensure your panorama photos come out just the way you intend.
Planning Your Panorama Shoot
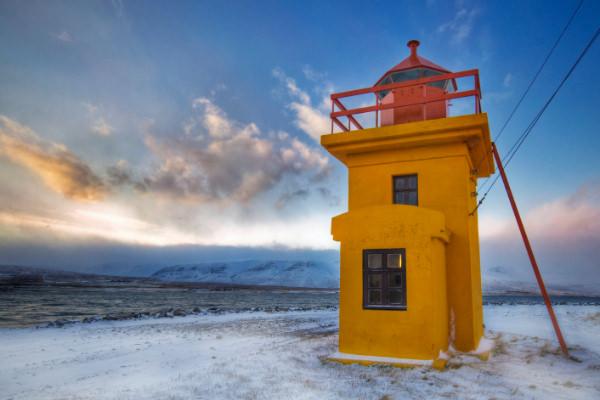
When photographing panoramas choose a location with a consistent tonal range. Because you are shooting a much wider angle than a regular shot it is easy to end up with a scene with so much contrast that you lose most of the detail.
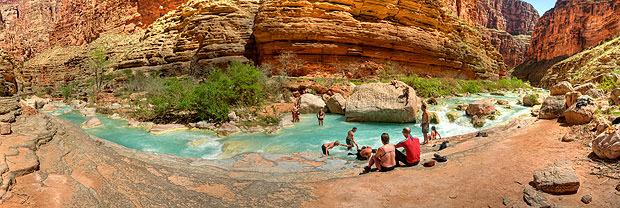
Choose a scene with an even level of contrast throughout so that you don't lose detail. Image by Jason Corneveaux.
Shooting in the harsh midday sun is a sure way to create too much contrast in your panoramas. Instead, shoot closer to the start or end of the day, or when the sky is overcast, as this will help reduce the contract, allowing you to capture detail in all areas of the scene.
Sunrise and sunset can make for dramatic panoramas, but the rapidly changing light conditions mean you have to work quickly. Get to your location with plenty of time to set up your equipment so you don't miss the critical moment.
Equipment
You can photograph panoramas with a hand-held camera, but you will achieve better results with a tripod. A panoramic head on your tripod is ideal, but they are very expensive, and you can still achieve some superb shots with a standard tripod. You can use a spirit level to ensure your tripod is perfectly level.
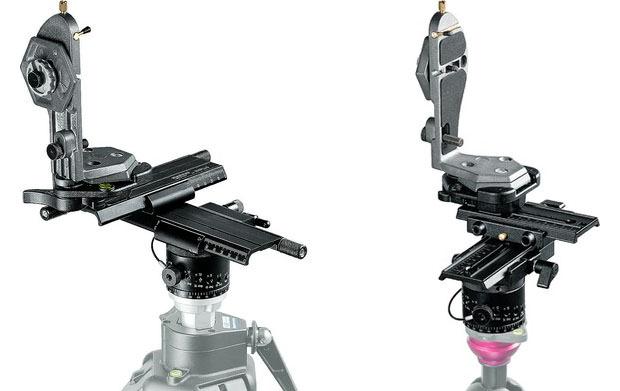
Panoramic tripod heads produce the best results but are expensive.
Set your camera to shoot in JPEG rather than RAW. RAW files give more detail than we realistically need, and their large file size can cripple your computer when stitching shots together.
Avoid using filters, such as polarizing filters, when shooting panoramas, as they produce very obvious colour changes at the edges of your shots, making them difficult to blend together when stitching.
Make a set of cardboard frames in varying panoramic ratios (3:1, 4:1, 5:1 etc). These are perfect for visualising the scene when you are at your shooting location.
Setting Up
Mount your camera on your tripod in portrait rather than landscape. This allows you to capture more vertical detail, giving depth to your panorama.
Set your camera's zoom to somewhere around its middle setting. This is where lens distortion is at a minimum, which will make stitching the shots considerably easier.
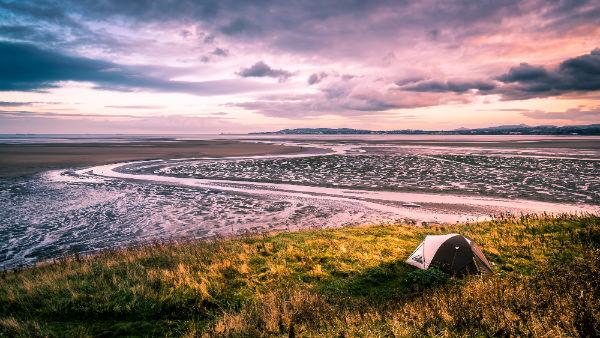
Look through your camera's viewfinder and ensure you can fit all of your scene in. It is important to include more of your scene than you actually want, because you will lose some of it through cropping during the stitching process. A good rule of thumb is to try to contain the part of the scene you actually want in the centre two thirds of the image, giving you a generous border top and bottom.
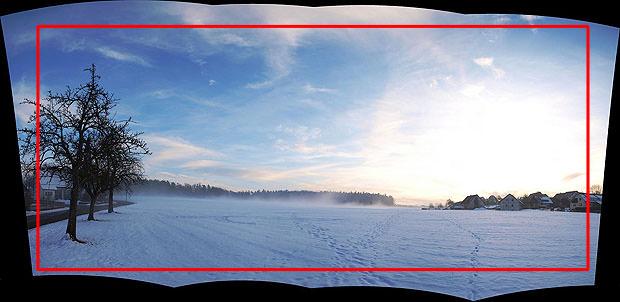
Leave a generous border around your panorama to allow for cropping. Image by flickrolf.
Including some foreground detail will add depth and interest to your panorama, but be aware that the closer something is, the more it is affected by alignment issues (called parallax error). When shooting, keep foreground objects away from image overlaps as much as possible.
Composition is just as important in panorama photography as it is in any other sort; don't get so bogged down in the technical details that you forget to photograph a visually appealing shot.
Carry out a few test pans of your tripod to ensure that your panorama's horizon is level. This is also a good time to figure out roughly how you will divide your scene into separate shots.
Focus on an object in the foreground and use a narrow aperture to give you maximum depth of field.
For consistency between shots, lock as many of the camera's settings as you can, including focus, white balance (or use a preset), shutter speed, and aperture diameter. This will make stitching and blending your panorama as easy as possible. Some cameras offer a panorama mode that locks all of these setting for you, based on the first image you shoot.
Shooting
Choose a shooting direction, e.g. left to right, and stick with it. Starting off one side of your scene, begin photographing. Work carefully but quickly to minimise any differences between your shots, especially when shooting in rapidly changing lighting conditions.
Get plenty of overlap between your photos - around 50%. This gives you plenty of pixels to play with when stitching your panorama.
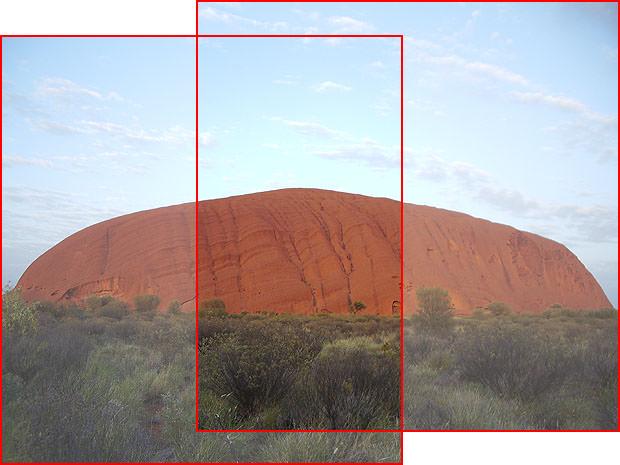
Allow an overlap of around 50% between shots to aid in stitching the panorama.
Be careful where you place your overlaps - avoid moving objects such as people or cars, and keep split lines away from any foreground objects or stand-out features in the scene.
When shooting multiple panorama scenes, separate them by shooting a frame with your hand over the lens. When reviewing your photos later this makes it much easier to see where one panorama ends and another starts.
Stitching
Stitching your panorama together should be simple if you've followed the advice above. You can either do it manually for maximum control over the outcome, or use one of the excellent panorama stitching programs available, such as AutoStitch.